There are a number of different ways of putting together a presentation with your PC. The most common is using presentation software such as Microsoft’s PowerPoint, which is where we will start our journey of discovery into the world of presentations and presentation software.
The main advantage of PowerPoint is that it is very, very easy to use and put together a presentation.
What is PowerPoint?
As mentioned before, PowerPoint is Microsoft's Presentation application. A PowerPoint presentation is made up of a number of slides. Although it can be standalone, it is usually used as a visual aid for a formal presentation. A PowerPoint presentation is executed as a slideshow and each slide can be displayed on the screen one at a time. This is the traditional way of creating a presentation. When creating a traditional presentation, be careful not to crowd the slides with too much information. They should not include your whole presentation word for word, just highlights or summary information.Creating a basic presentation.
When PowerPoint is loaded, your page will display the first slide of the presentation - the title slide.

Each slide can contain "placeholders" for different types of information or can be a blank slide. This first slide has placeholders for text - your title and subtitle. The placeholders do not display or print unless you place information in to them.
Have a good look at the screen - you will see the standard Microsoft Ribbon at the top of the page. In the centre or larger window, you will see your current slide. On the left hand side, you will the slides or outline view. At the bottom right hand corner are the buttons that will change to slide show, slide sorter or normal view as well as a slider to zoom in and out.
Let's start to create a simple presentation about presentations!!!
• On this title slide, click in the title placeholder, and type PRESENTATION SOFTWARE.
• In the subtitle placeholder, click and type POWERPOINT 2013.
You have now created your first slide - now wasn't that the easiest thing I've got you to do so far in these classes?? Hopefully it looks similar to the following screenshot.

Now comes the hard bit - we are going to add another slide. In the Ribbon, you will see a button titled New Slide.
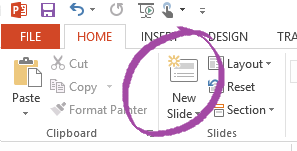
• Click on the New Slide button
• Add title and text as shown

• Click on Add New Slide button
Layouts
When you click on the Add New Slide button, PowerPoint will display the basic slide layout. This will be OK for some of your slides, but there are other layouts that you can choose.The basic slide layout has an area for a slide title as well as an area to create a bulleted list. In the centre of the slide, you will see a group of six icons. As well as text, you can add different types of objects to enhance your slide.
On this slide, we are going to add a slide title and then an image that relates to presentations. With images, you can add clip art or you can add a picture from a file i.e. an image or photo that you have stored on your hard disk.
• Click on slide title and type in PowerPoint Image Objects
• Click on the online picture button (in PowerPoint 2010, this is Clip Art)
• In the search area, type in presentations and press enter (or Go)
• Select a relevant graphic by clicking on it and then click on Insert
• It will then be transferred to your slide


• From the Format Ribbon, click on an appropriate frame option.

You now have your third slide completed.
• Click on the Home Tab display the main ribbon and click New Slide
• Click In the Title and type More PowerPoint Image Objects
• Click on the button for Pictures
• Browse and Select one of your photos (or just one of the sample pictures)
• From the format tab, choose an appropriate frame option or effect
• Slide 4 complete!!

• Go back to the Home Ribbon and click New Slide
• Click on Title and type in Adding a Media Object.
• Click on insert Video button (media object).
There are a range of video formats that are supported by PowerPoint. WMV is the default Windows/Microsoft video format (Windows Media Video).
Select a movie to add. You can just add the sample video or any other video that you may have. If you use a You Tube downloader, you can include a You Tube video - there are plenty of free YouTube or online video downloaders available if you wish to capture the video to your hard disk rather than use the YouTube link.
In PowerPoint 2013, you have a few choices for the type of video you can add.


You can make some choices about how your video is to display as well as some basic editing such as trim and fading the video in and out.

You can also use the Format Ribbon to change the shape of your object or add a frame.
Running a slide show
This is a no frills presentation - we will learn how to enhance our slides and presentations later.• To make sure that your presentation starts at the beginning, click on your first slide in the left hand panel.
• Click on the slide show icon in the bottom right hand corner of the screen.
• As we have no slide transitions or timing included, just click on the mouse button to progress to the next slide. Don't forget to click onto your movie to see it play, if you have included one.

Or you can use the buttons within the SlideShow Ribbon

The spacebar, arrow keys and scroll button on the mouse will also advance your presentation to the next slide.
Making it Pretty
So far we have created a very basic no frills presentation. Keeping to the theme of simple for today, we will apply a Design Theme to our presentation.• Click on the Design Tab
• Choose a design theme - you can roll your mouse over any of them to preview what your presentation will look like.

• Make sure that you are on your first slide and run a slide show again to see your now very pretty presentation. Use mouse or keyboard to scroll through the slides.
Once you have selected a Design Theme, you can change the Colours, Fonts and even background style to personalise your theme.

Activity
- Create the sample presentation
- Add a New Slide
- Use the Table button to add a table to your slide
Different Slide Layouts
When you click the New Slide the button, you get the default slide, which is Title and Content, but there are other slide layouts available as well. You can access these by clicking on the little arrow in the corner of the New Slide button. The previews will differ depending on what theme you have applied to your presentation.

Of course, you can also choose a Blank slide and use the Insert Ribbon to add the elements anywhere on the slide.

You can even insert a screen recording if you are game!!
Notes
Notes can be included for each slide – these are great for the presenter as they can contain more information than the actual slide. You can print notes with each slide as well.

Slide Transitions
Once you have created all your slides, you can run a slideshow. A plain slideshow will display each slide and progress to the next one when you press the Enter or spacebar on the keyboard or click the left mouse button. They are displayed in order, starting from the current slide. We saw how to do that earlier on in the lesson.To make a slide show more interesting, you can add transitions. A transition is the manner in which your slideshow progresses from one slide to the next. You can set the same transition for all slides within your presentation, or you can set different transitions for each slide.
Use the Transitions Ribbon to create your transitions.

The transition section is titled “Transition to this slide”, so what you are selecting, is how the current slide will be displayed from the previous slide - i.e. the transition process from the previous slide to the current slide. When you select a transition, PowerPoint will show you a preview of the transition on your current slide.
If you want all of the transitions to be the same, click on the first transition and then Apply To All, otherwise, select each slide and then click on the transition for that slide.
You can choose the speed of the transition as well as a timing option rather than mouse or keyboard click. Be careful with timings and make sure that they are suitable for the actual presentation. There is nothing worse in a presentation for the presenter to be talking about a topic and the wrong slide being displayed.
And to top it all off - you can even choose a sound as part of the transition. This is where you can create a real monster, so please remember my motto “less is more” and avoid “Death by PowerPoint”.
Animations
Transitions determine how a presentation moves from one slide to the next. Along with the transitions, you can also put sounds.Animation within PowerPoint allows you to animate and create transitions between the individual objects on a slide, not just the slides itself.
Warning though - you can drive your audience absolutely nuts if you go too crazy here!!
This is DEFINITELY where LESS IS MORE.
Preset Animation Scheme
To add Animations to your presentation, use the Animations Ribbon. You can choose a preset animation scheme by selecting an item on the page and choosing an animation from the list.When you have an object that has a number of paragraphs, such as a list, the animation will be applied to each of the lines.
To preview your animation, select an object and click on an animation type with the mouse. PowerPoint will show you a preview of your animation.
There are three types of animation that can be applied to an object.
• Entrance – how the object initially appears on the screen
• Emphasize – how you want the object to behave once it is on the screen
• Exit – how the object will leave the screen
If you want to apply more than one of these to an object, you will need to use the Add Animation option.

If you don’t like the basic animations, use the drop down arrow and select the More option for the type of effect you wish to apply.
Motion Path
A sure way to ensure “Death By PowerPoint” is to use a Motion Path. A motion path allows you to use a predefined shape/path or use Custom Path to draw your own path that an object will follow.Animation Pane
The animation Pane is the timeline that is used to control the animation of any or all objects on a slide.Each item can be fully controlled by selecting an item in the timeline and then clicking on the drop down arrow.

Activity
Add Transitions and animations to the slide show you completed in previous activityHere is a video on the basics of creating a presentation, You can watch on YouTube or
Watch it here below.
Printing your presentation
When you are doing a presentation, you often need to hand out slides to the attendees of the presentation. If it is a long presentation, you don't want to hand out reams and reams of paper - one slide to a page. There are choices about what you print and hand out. You may have different notes for yourself than what you hand out.Printing options are under the File Tab.

The first thing that you can change is whether you wish to print the entire presentation or just selected slides.
Click on the drop down arrow next to Full Page Slides to have full control over how you print your presentation. You can choose to print the presentation with any notes, or you can produce handouts for the attendees.
Handouts allow you to print multiple slides per page – Great for saving paper for a long presentation, while still giving the attendees something to make notes on and to keep.
Outline View will print the presentation in outline mode - no pretty stuff, just a page of each item one after the other.
In the Print Menu, you will have a preview that will show you what the printouts will look like with your selections.
Tips for creating a good presentation
There is nothing worse than sitting through a poorly designed and implemented presentation.My personal pet hate is being in a presentation where the presenter is reading directly from the PowerPoint slides. If that was the case, I’d rather them email it to me and I can read it in my own time!!!
There are plenty of good articles that have some tips on presentations and using presentation tools such as PowerPoint. I have listed a couple of the better ones below, particularly the first one. Please read at least this one before you embark on your first presentation!!!
http://www.mrmediatraining.com/2011/03/10/the-five-most-common-powerpoint-mistakes/
http://www.lifehack.org/articles/technology/10-tips-for-more-effective-powerpoint-presentations.html
https://support.office.com/en-sg/article/Tips-for-creating-and-delivering-an---effective-presentation-f43156b0-20d2-4c51-8345-0c337cefb88b
LESS is MORE
Saving your Presentation
PowerPoint, like all of the Microsoft Office applications, allows you to save your presentation in a number of different formats. The standard formats are included, such as PDF, but there are some others that can be quite useful. One option is to save your presentation as a Web Page or even a video.Some of the Save Options that you have


Activity
Try Various Save options for your presentationA suggestion would be to try save as a Video type file as well as JPG. JPGs are quite interesting as it will save each slide as a separate image. You could use the images to create a document or handout of your presentation.
Assessment Task
Just giving you the "heads up". For those that are doing the Social Media class, you will be graded on your Social Media PowerPoint presentation for this unit. If you are not doing the Social Media unit, come and see me to discuss what topic you can use to create your presentation.
No comments:
Post a Comment